| |
|
|
| |
Introduction: What is Beat Detection? |
| Beat detection is a powerful audio analysis technique that identifies rhythmic elements within an audio file, such as the beats in a song or the pulse in a track. By pinpointing the exact timing of these beats, beat detection can help with tasks like audio synchronization, remixing, and timing adjustments. It’s widely used in applications where timing is essential, including music production, podcast editing, and sound design for video, as it allows for precise editing and manipulation of rhythmic elements. |
|
|
|
| |
| How to Perform Beat Detection with Dexster Audio Editor |
| Follow these steps to detect and mark beats in your audio files using Dexster Audio Editor. |
| |
| Step 1: Download and Install Dexster Audio Editor |
| To begin, download Dexster Audio Editor, install it on your computer, and launch the application. |
| |
| Step 2: Load Your Audio File |
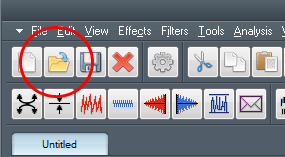
| Once the software is open, click on the Load button to open the audio file you’d like to analyze for beats. |
 |
| |
| Step 3: View the Waveform |
| After loading the audio file, Dexster will display a sequence of waveform visualizations, providing a visual representation of your audio content. |
 |
| |
| Step 4: Access Beat Detection |
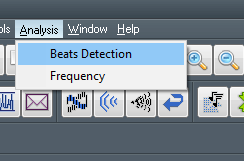
| Navigate to the Analyze menu and select Beat Detection. This action will bring up the beat detection screen. |
 |
| |
| Step 5: Configure Beat Detection Parameters |
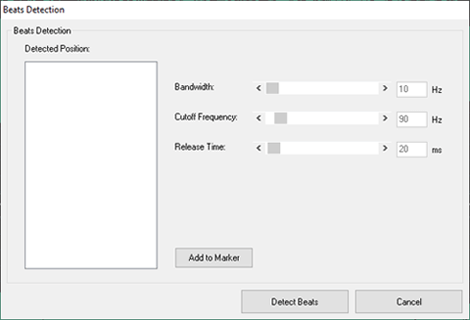
| The beat detection screen provides several adjustable parameters: |
| Bandwidth: Represents the audio bandwidth in Hertz, which affects the frequency range being analyzed. |
| Center Frequency: Defines the center point of the frequency range being analyzed, also in Hertz. |
| Release Time: Controls the beat release time in milliseconds, influencing the responsiveness of the detection process. |
 |
| |
| You can adjust these settings for customized beat detection or leave them at their default values. Once ready, click Detect Beats to begin analysis. |
| |
| Step 6: View Detected Beats |
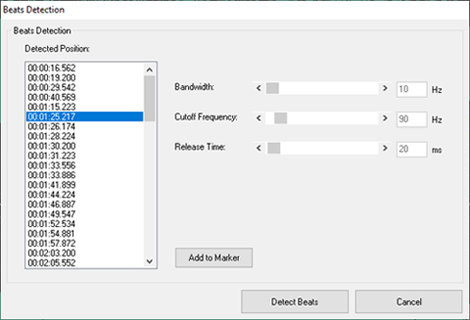
| Dexster will now detect the beats and list all identified beats on the left side under Detected Position. |
 |
| |
| Step 7: Mark Individual Beats |
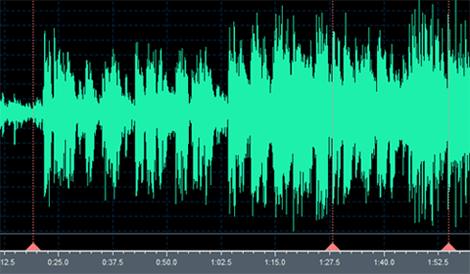
| To highlight specific beats in your waveform, click on each individual beat in the list and select Add to Marker. This will place a red dotted line at the beat’s position on the waveform. |
 |
| |
| Step 8: Exit the Beat Detection Screen |
| Click Cancel to close the Beat Detection screen. |
| |
| Step 9: View Beat Markers on the Waveform |
| All beats marked with red dotted lines will remain visible on the waveform, with time positions labeled at the bottom of each marker. These markers help you easily locate and manipulate beats within the audio file. |
 |
| |
| With these steps, Dexster Audio Editor makes beat detection a straightforward process, enhancing your ability to work precisely with rhythmic elements in your audio. |
| |
| |
| |
| |
|
| |
|
| |
 |
Dexster Audio Editor |
| Price: USD 45 |
| for Windows 7, 8, 10, 11 |
| |
 |
 |
| |
|
|
| |