| |
| |
 |
Dexster Audio Editor |
| Price: USD 45 |
| for Windows 7, 8, 10, 11 |
| |
 |
 |
| |
|
|
| |
|
| Advanced Audio CD Extraction in Dexster Audio Editor: Define Custom Begin and End Time Range and Save Tracks in Various Formats |
| |
Introduction:
Dexster Audio Editor offers advanced features for extracting audio CDs with the flexibility to define custom time ranges and save tracks in popular audio formats such as MP3, WAV, OGG, M4A, AAC, and WMA. This article will guide you through accessing and utilizing this powerful audio CD extraction feature within Dexster Audio Editor. |
| |
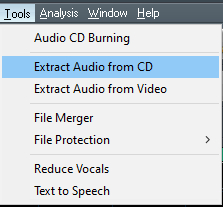
Step 1: Accessing the CD Extraction Feature:
Launch Dexster Audio Editor and navigate to the "Tools" menu. From the dropdown menu, select "Extract Audio from CD." This will open the CD extraction window, allowing you to customize your extraction preferences. |
 |
| |
Step 2: Inserting the Audio CD:
Insert the audio CD you want to extract into your computer's CD drive. Dexster Audio Editor will detect the inserted CD and display it in the CD extraction window. |
| |
Step 3: Selecting Device and Output Format:
In the CD extraction window, choose the desired CD drive from the available devices listed. Next, select the preferred output audio format from the provided options, such as MP3, WAV, OGG, M4A, AAC, or WMA. This will determine the format in which the extracted audio will be saved. |
 |
| |
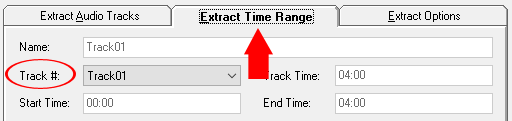
Step 4: Defining the Time Range for Extraction:
Navigate to the "Extract Time Range" tab within the CD extraction window. Here, you will find a track selection dropdown menu labeled "Track #." Choose the specific track you wish to extract from the available options. |
 |
| |
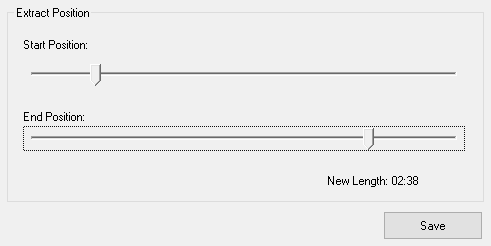
Step 5: Setting the Start and End Positions:
Specify the start and end positions for the extraction by adjusting the corresponding sliders or entering precise time values. This allows you to define a custom time range within the selected track for extraction. This feature is especially useful if you only want to extract a portion of a track rather than the entire duration. |
 |
| |
Step 6: Saving the Extracted Audio:
Once you have defined the desired time range, click the "Save" button in the CD extraction window. By default, the extracted audio will be saved to the directory "C:\Extracted Audio CD." However, you can choose a different location by navigating to the desired folder before saving. |
| |
Conclusion:
Dexster Audio Editor offers a comprehensive audio CD extraction feature that allows you to define custom time ranges and save tracks in various popular audio formats. By following the steps outlined above, you can easily extract specific tracks or portions of tracks from audio CDs and save them to your preferred audio format. Enjoy the flexibility and control that Dexster Audio Editor provides for managing your audio CD collections with ease and precision. |
| |
| |
| |
| |
|
| |
|
